What have you fixed on your motorhome this week?

Today we fixed the bed platform which, as we discovered yesterday, was making it's way into the garage, after detaching itself from the back panel. And not for the first time in its short life it appears from the many extra screw holes discovered during fixing it this morning ?.
However unlike the previous times people have "fixed" it we have done it properly rather than bodged it to look ok temporarily having acquired the necessary doings to fix it (broom handles to prop it up, metal bracketing, silicon and epoxy, screws etc) from a Bricomarche yesterday afternoon.
Just waiting for the sticky stuff to go off before we remove the bracing (extendable broom handle pushed between the wall of a handy building and a towel covered chock) pushing the back panel back in.
If anyone is interested I have pictures of the stages of the fix.
And I urge anyone with the same configuration (bed platform over garage) to check theirs.
What make and model of motorhome do you have? Not all are fixed in the same way.
 
What make and model of motorhome do you have? Not all are fixed in the same way.
Bailey Approach autograph 750 first registered in 2014.
Edit: I didn't put it on my original post as I thought if people were interested they could see what we have from my profile.
 
Last edited:
Well I thought I’d finished and so took the pictures of our new acrylic splashback but my dear wife says until I clean the finger marks off the mirror, polish the taps again and remove the sealant smudge from the worktop she will not declare the job finished!
E61D6FC0-AE8A-47A6-9B26-ABDAC80C1A87.jpeg EFD75FED-407C-4655-89C7-183D6243C177.jpeg DBA63818-67BD-484B-84A4-C3F2CEEBF3E5.jpeg
From £15 worth of acrylic sheet, a couple of hours to cut and shape to fit the mirror fixing and a bit of sealant it’s fixed the lack of proper finishing by Elddis.
 
Can anybody tell me how to get the fridge out of my motorhome ( where it fix and what to )

Subscribers  do not see these advertisements

 
It’s a bailey 625 motorhome not sure about fridge I will go and look tomorrow
 
not fixed but a couple of small improvements
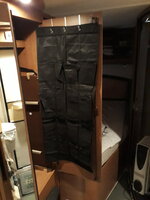
spent £2.99 in poundstretcher on a over door organiser for the wardrobe, had to cut off bottom row of pockets but should prove useful
 

Attachments

  • 20200202_103952.jpg
    20200202_103952.jpg
    88.2 KB · Views: 95
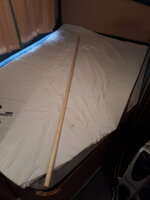
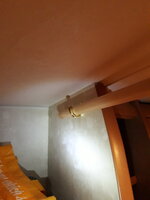
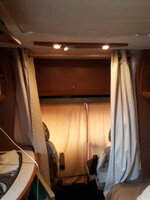
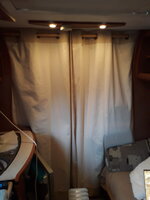
and have added a curtain behind seats for a bit of quick privacy if we stop and want to change or something
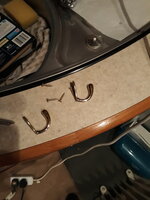
bit of dowel and a couple of coat hooks which the dowel is a tight fit in
 

Attachments

  • 20200202_104123.jpg
    20200202_104123.jpg
    55.6 KB · Views: 119
  • 20200202_104134.jpg
    20200202_104134.jpg
    104.4 KB · Views: 115
  • 20200202_110013.jpg
    20200202_110013.jpg
    67.5 KB · Views: 119
  • 20200202_154523.jpg
    20200202_154523.jpg
    80.6 KB · Views: 117
  • 20200202_154617.jpg
    20200202_154617.jpg
    69.4 KB · Views: 119
Fitted two LED reading lights in the bed area.

Elddis, in their wisdom had fitted one light in one corner of the bed. They had also fixed it at the end opposite the window. We prefer to have fresh air during the night so tend to sleep with our heads at the “window end”. (We like to assist those who “gas” Motorhomers in France, as we want to claim for two Rolex watches, two I-Pads and £2k :cool: ).

Two lights bought from e-Bay, Chinese make but good quality aluminium bodies, and fixed at our preferred end.

Now we see to read in bed when we want.

Subscribers  do not see these advertisements

 
Another upgrade rather than a fix for the Cheyenne. Added a 150W solar panel to go with the existing 100W which I installed 2 years ago. The 100W installation has been very useful in keeping the batteries topped up but, with a compressor fridge, it showed its limitations once or twice last year. As you can see, it is a very, very snug fit:whistle2:

The EC325 solar charging is now redundant as it has now been replaced with a Votronic MPP 250 Duo with an LCD Solar Computer display. Should squeeze every last electron out of the sunshine now.

150W Panel 020220.jpg


Yes, I know, the rest of the roof needs cleaning as well..... :giggler:
 
I replaced my big side window, that a scrote had cracked trying to force the window at some piont, not as easy as i thought, you need two people if the window is big
 
Last edited:
Another upgrade rather than a fix for the Cheyenne. Added a 150W solar panel to go with the existing 100W which I installed 2 years ago. The 100W installation has been very useful in keeping the batteries topped up but, with a compressor fridge, it showed its limitations once or twice last year. As you can see, it is a very, very snug fit:whistle2:

The EC325 solar charging is now redundant as it has now been replaced with a Votronic MPP 250 Duo with an LCD Solar Computer display. Should squeeze every last electron out of the sunshine now.

View attachment 360541

Yes, I know, the rest of the roof needs cleaning as well..... :giggler:
Pete5996 how are you covering/fixing the flex wires that go to the black box part in the photo?
Phil
 
Pete5996 how are you covering/fixing the flex wires that go to the black box part in the photo?
Phil
The black fittings are MC-4 twin connectors, to link the two panels in parallel. They are weatherproof and I'll leave them exposed. I have anchored the cable runs on both sides with strips of self-adhesive trunking and bedded the connectors to the roof on blobs of Sikaflex 512 to eliminate any movement when under way.

Subscribers  do not see these advertisements

 
I started drilling out the blind rivets on the driver's doorstep for the chequer plate covering. Called a halt as I realised I did not have a stock of 4mm rivets to do the repair with :gum: .... to be continued
 
Not us, but hubby helped another Carthago owner by finding out how to use his media system (similar to ours) so he could watch DVDs on the TV screen instead of the little media unit screen! Oh, and hubby also found out how to alter and input the co-ordinates into his Garmin sat nav for him too ... :giggle:
 
I've repaired nothing !!!!

But am preparing to install an extra 240v socket toward the front of the saloon as the nearest is to the rear of the Hab door

Got all the spare parts from our local Caravan and motorhome spares shop at very reasonable prices so when the weather improves going to get out and under to thread the cable along the chassis member located holes to drop cables through the double floors so should only take a short while

Photo when complete
 
do you think i shuld paint the wooden affect part of the door white ?
bill
Ps handle piking tomorrow i have ben informed
bill
Nope, it makes a nice contrast with the centre panel
 
Glued back together the lens on the luggage rack light after a French m/h reversed into us on a campsite at Sidi Kaouki in Morocco. Won't get a new one here but it'll be okay until we get back home. Took £20 off him though.
 

Join us or log in to post a reply.

To join in you must be a member of MotorhomeFun

Join MotorhomeFun

Join us, it quick and easy!

Log in

Already a member? Log in here.

Latest journal entries

Back
Top