What have you fixed on your motorhome this week?

The only guide to fitting the plates I can find is this one

It looks really difficult to take the Door innards apart in this way. Is this what you had to do?


Pretty much, although the guy in the youtube video is and animal and gives the impression of it being a struggle, but the video was a help to know the order in which to get at bits.
I did not want to end up with damaged plastic trim so bought a descent set of trim removal tools.

The only other tools you need are a philips screwdriver, a 10mm socket on a 1/4" drive ratchet, a 10mm spanner and a T40 torque drive bit.
I found it a little tight for space with my pork sausages for fingers so dainty little fingers would be a help and when removing the electric window switch cluster keep an eye out for the spring clip which will ping off. It took me a little over half an hour a side to fit them which included removing the Remis blinds and refitting. I also removed the door pocket to make removing and refitting the door card easier.
Are the Remis blinds easy to remove?
Unfortunately I certainly don’t have dainty little fingers and am clumsy due to Dupytens. Now I remember why we haven’t fitted the plates but should have done. It also explains why I haven’t seen any cabs with them fitted.
We will have another look at the video tomorrow and decide whether it is something we can attempt.
 
fitted new wheal trims and done a oil and filter change
bill
 
Full service , air , fuel , and oil filter's changed , drained and flushed engine oil , changed gearbox oil , general check over , tyres fan belt , lights etc , toilet flush pump and diaphragm replaced , mounting bracket's fitted for awning winding handle , new 12v switch on fridge , 12v fuse for fridge which blew while being worked on , cooker ignition switch , air suspension pressure increased , motorcycle mounted for first time on rack , general interior clean .
Faults found , oil drain plug damaged ( sourced) . electric window switch , and reversing light switch both need replacing (both in post) . 2 damper's under air cleaner box shot (possible source found) . intermittent fault with rear fog light switch .
 
Are the Remis blinds easy to remove?
Unfortunately I certainly don’t have dainty little fingers and am clumsy due to Dupytens. Now I remember why we haven’t fitted the plates but should have done. It also explains why I haven’t seen any cabs with them fitted.
We will have another look at the video tomorrow and decide whether it is something we can attempt.

The Remis blinds on our doors are a doddle to remove on our 2013 Boxer. To remove the Remis door blind you stick your finger up behind the Remis badge at the top of the frame and push out the badge.
remis-cover.jpg

Having undone the screw behind the badge you then just pull away the blind frame from the door and it pops out of the clips that hold it to the door, job done.

I thought it was only the Transits that were susceptible to being broken into by banging a screwdriver in under the door lock until I read your earlier post about you being broken into which prompted me into buying and fitting the proplates.

Subscribers  do not see these advertisements

 
9 hours repairing the double electric step last saturday that sheared its woodruff key & then everything & anything that could go wrong did & some times twice.:(
Checked all wheel bearings after a German I met had one go.
 
Well today I started a fix in that I have sanded down some filler applied yesterday (in 32 degree heat) to the damaged nearside rear wheel arch that I did in October last year and since we got home it seems like it's been raining constantly since November

So now to find some Fiat white here in Montendré so I can paint it whilst it's still over 10 degrees lol
 
Re-seated nearside front indicator bulb - kept "failing" and putting up a warning on the dash. Bit of a pain to get to, easier with the little panel removed (2 screws).
Then when putting it all back managed to disconnect the scuttle drain pipe and now it won't stay put. Soddit, it ain't gonna rain for the next 6 weeks so just sealed it up. Fix it when I get home (now touring Italy).

Subscribers  do not see these advertisements

 
I decided that the can of tyre goo that was 4 years out of date was definitely going to be useless in case of a flat (rather than probably useless before it expired). So I managed to find someone selling a spare wheel carrier on eBay and picked up a second hand wheel from a breakers. I'll be replacing all 5 tyres before I go to Europe anyway.

For reference, it's a 2007 x250 Ducato with 15" wheels. The part number of the carrier is 1363360080. The carrier didn't come with any bolts or the wind-down tool (5 sided thing). I needed some short-ish mate bolts to bolt the carrier into the wheel well. The winding end is supposed to attach to the driver's side behind the rear wheel with some rather expensive bolts. Instead I used a couple of 100mm M10 bolts with lock-nuts to go through the holes with a few washers. Don't tighten up too tight or you'll just crush the cross-member.

I've also got myself a nice long breaker bar with a 21mm socket. I've just got to work out now whether I want to carry the Fiat scissor jack which is pretty close to being overloaded when the van is empty, or my 6t bottle jack which doesn't have a lot of lift so can sometimes have issues getting the wheel off the floor.
 
Not exactly a fix but on Friday I installed a Status 580 aerial prior to an overnight on a training course this weekend.

Scary as *#&$ drilling through the roof for the first time but overall it was a doddle and the improvement over the existing Status 330 was immense.

Very much recommended, so far.
 
Filled the water tank and it leaked out again turns out the previous owner had bodged the drain down fitting with mastic, and the nut is rattling around inside the tank so I rebodged it with mastic hope it works otherwise the tank will have to come out. At least there's plenty of ground clearance ( auto sleeper talisman ) so even I can squeeze underneath hopefully.
 
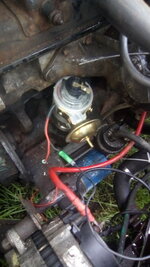
Converted my sons van to electronic ignition
 

Attachments

  • IMG_20180426_111334.jpg
    IMG_20180426_111334.jpg
    101.8 KB · Views: 46
IMG_20180426_135601.jpg

Their was a bit of a bang when we started it up nothing a bandage can't fix :rofl:

Subscribers  do not see these advertisements

 
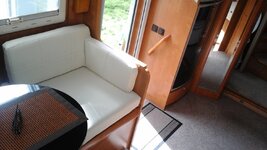
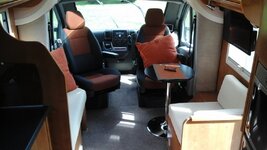
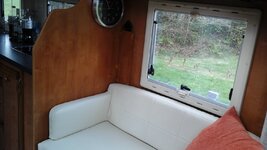
At last ... Got new Faux leather done / returned today ... All looks ok ... & half the price of leather & easy clan ... Single large seat to offside works well as table houses well ...
 
More images but system not allow more than one pic ????
 

Attachments

  • 20180426_104448.jpg
    20180426_104448.jpg
    151.2 KB · Views: 66
Nearside . Bench seat ...
 

Attachments

  • 20180426_111009.jpg
    20180426_111009.jpg
    149.7 KB · Views: 47
Clutch Slave Cylinder! £106.68! the joys of running a 26 year old VW T4 base M/H
BUT!
I can open the bonnet and actually recognise things, like "Rocker Box Rubber Gromet";)
 
Fitted Tyrepal after pumping up the Tyres and making a 12 volt extension lead for my compressor, tidied all the cupboards and reinstalled my Truma Combi Boiler after replacing the heating elements. I tested it on the EHU and heating and hot water are back and working again on electricity. Topped up the windscreen washer bottle and the coolant water.

Just the step to sort out now and give the van a good clean and polish before we get around to going on holiday.
 
two new number plate light fittings having had an advisory on the MOT last week. Less than £5 on e-bay so pretty pleased about that really - always expect it is going to cost lots when anything goes wrong nowadays, Now off to look at the dishwasher (no. not the wife!) not emptying properly.
 
Replaced the Trumavent. I couldn't be bothered fiddling around with grub screws to just replace the motor (£110) so I bought the full kit instead (£160). Three screws, two connectors, less than 15 minutes. Job done.

Subscribers  do not see these advertisements

 
While I did not actually fix it myself...
One of our E&P jacks had a weeping fitting so all sorted at Conrad Anderson in Birmingham today - a new hydraulic hose fitted all sorted out within an hour!


Finally got round to fitting dunlop air assist to the mh...
Chausson 620 on a ford base..
Chose the kit with a compressor...and was impressed with it..
Everything you could need to fit it and plenty of hose..
Just hope it adds all the benefits that ive been reading about on the air assist threads on here..
I might also get round to underslinging a spare wheel with the extra inch or two clearence i can now get on the back if i need it..
Andy

20180509_162054.jpg


20180509_162121.jpg


20180509_162159.jpg
 
As normal I have not fixed anything. Abus security locks fitted by Harrison Locksmiths on the drivers and habitation doors.

A tricky job done really well by Paul Harrison.

IMG-20180509-WA0011.jpeg
IMG-20180509-WA0005.jpeg
IMG-20180509-WA0003.jpeg
 

Join us or log in to post a reply.

To join in you must be a member of MotorhomeFun

Join MotorhomeFun

Join us, it quick and easy!

Log in

Already a member? Log in here.

Latest journal entries

Back
Top