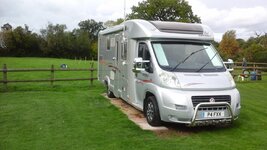
What have you fixed on your motorhome this week?

The earlier Ducatos suffer terribly in heavy rain, with the water migrating from the wiper blades onto the side windows, which then blows onto the mirrors.

It can get so bad that I literally can't see in the mirrors and is quite dangerous, so I got this at the NEC and run a strip down each A pillar to divert the water.

Worked quite well over the weekend. I've yet to see the difference in heavy rain, but hope it improves the vision:)
IMG_0549.jpg

IMG_0550.jpg

IMG_0551.jpg

IMG_0552.jpg
 
@PP Bear It's been a long time since I had a C class. But I do remember applying a coating of some hygrophobic gel.. I can't find the one that I previously used but RainX appears to get the job done.


I used this on my windscreen, side windows and mirrors and never had an issue.

I did use the drip strips above the doors though for when I was parked.
 
Renewed the outside light (John Cross Motors(y))

Fitted a new Bonnet release cable

Drained down the water system

Still looking for the right fridge, There is one on Gumtree but the vendor is not answering his phone:(


edit; made one of those steering wheel "trays" @Minxy Girl found
 
Easiest fix ever today, ever since having the van we have had two lights in the cab area that did not work. Assumed controlled by habitation light switch that controlled two lights by cooker. Switch on ,no power at lights. Had lights in and out no end of times, another switch on console traced to alarm so not that. Today went in to get manual out of cab overhead storage and felt odd switch. Turns out seperate switch each side for lights hidden on inner lip of overhead storage area. No mention in book, well happy now been driving me potty that they didn't work

Subscribers  do not see these advertisements

 
Replaced the VW logo in the centre of the grill, the old one was a bit shabby
 
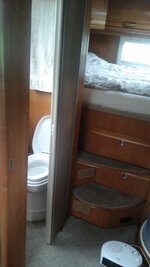
Removed loo door ... opened up access by 6" & fitted space save slider ... That was a couple if weeks ago ...

Subscribers  do not see these advertisements


Attachments

  • 15094522092671529326145.jpg
    15094522092671529326145.jpg
    71.4 KB · Views: 68
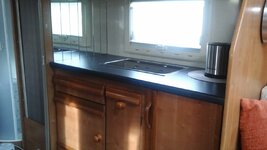
For anyone who like to modernise their vans . Last month project was to remove the dated but ok, 3 burner hob/ sink / worktop & replace with this ..... Also allows easy access to boiler ....h/c water feed pipes & blown air pipes which I've also re directed for better flow / distribution of heat to protect water pipes ... etc .. Good fun doing it with a few bottles of B& C ...
 

Attachments

  • 15094530544431563457689.jpg
    15094530544431563457689.jpg
    139.3 KB · Views: 106
Phew, busy couple of days and still more to do. We just got back from a 2600 miles trip round the UK and picked up a few bits for the van while we were there. Most awkward bit was a new exhaust that has lived in the over cab bed for a month till we got home
So.....
Replaced the old light above the hab door. The old one had a switch at the bottom, the new one is remotely controlled with a little box of tricks wired into the light circuit and a couple of fobs.
Fitted a Snipe 2 satellite dish in the roof and Avtex 16” tv ( and miles of wiring!)
Fitted aforementioned exhaust with a few modifications to the side exiting tail pipe.
Changed oil
Changed oil filter
Tightened up screws holding the passenger seat base, it was creaking and driving me mad everytime we went round a right hand corner.

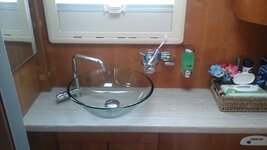
Couple more jobs to do tomorrow, change front bottom ball joints and take the bathroom sink out to fix the tap/shower head locating socket.

Then we can go away again...
 
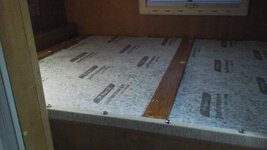
Been a bit annoyed with creaking bed over garage . So today used 3 x 3" x half inch pine equally placed on base of bed ....
Drilled & used bolt to secure .... However wood on wood may creak again.... So .. used underlay to cover base bed then secured wood braces across ...
Lot of flaffing about but a lot more secure & no creaks ...
Reckon I've added more support too .
Had the wood so only a tenner for the underlay ... sprayed glue to secure underlay bed base ..

Subscribers  do not see these advertisements


Attachments

  • 20171101_170604.jpg
    20171101_170604.jpg
    155.5 KB · Views: 70
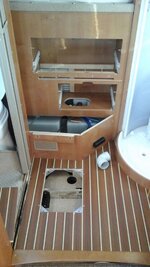
Decided to replace / re- run the heat pipe to the garage area.
Through double floor area . Made easy as I had cut out an inspection hatch month ago . Made it simples as it was a three outlet from one pipe from boiler. Now it's 2 into one so more heat usable ... Placed end of pipe near water tank so that should do the job when it gets a bit chilly. All tested & works better than original piping ... & will pump heat into the garage too .
 

Attachments

  • 20171103_140818.jpg
    20171103_140818.jpg
    93 KB · Views: 73
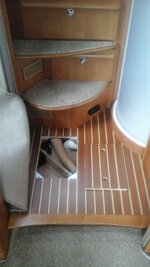
Job done . Steps to bed re installed . The heater pipe goes through to the garage (water tank located there).
I missed a pipe join further under the double floor which led to the washroom nearby the wheel arch .
So it meant there were to 3 ...T?. joins making that five extension from one feed from boiler . Hence making the flow of hot air min......
I took this out as there's now air , under pressure blowing into the washroom .
So I now have one pipe coming from boiler vented next to the shower & piped under the wardrobe ( new hole cut out for this vent) a T join as above , pipe to garage ...
All tested and it's like a fan heater blowing ...
I have also done similar to the front of the van & that works better too ....
I always consider protecting the pipes a very " must do "....
Have tested the flow throughout the van & the van heats up a lot quicker as there's more air flowing through at a better rate ..
phew ....
 

Attachments

  • 20171104_135133.jpg
    20171104_135133.jpg
    89.7 KB · Views: 68
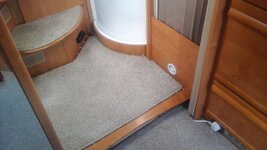
Pic of new vent (heat)under wardrobe door ...
Also fitted 2 x vents(non heat ) on the step bulkheads for efficient air flow , for heat distibution & general ventilation ...
 

Attachments

  • 20171104_140955.jpg
    20171104_140955.jpg
    181.8 KB · Views: 61
Sounds like you’ve had a bit of a project going on there.

Subscribers  do not see these advertisements

 
Pic of new vent (heat)under wardrobe door ...
Also fitted 2 x vents(non heat ) on the step bulkheads for efficient air flow , for heat distibution & general ventilation ...
Really enjoying your modifications, thanks for posting. In this picture is a black oblong box which I also have on my Rapido and thought it was something to do with the alarm but can't find any info about it. Please can you shed any light on what this is and how it works, many thanks. David
 
Oh thanks ...David ...
Will attach a pic in a min ...wiv part details
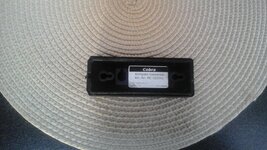
The black box is a Cobra Gas Sensor ...
Not sure what gases it sensors . There's a small push button on the side . I can only assume that's the off button to deactivate if the alarm sounds
Cheers
 
Pic . Showing details at rear of unit ... Cheers .
 

Attachments

  • 20171104_150836.jpg
    20171104_150836.jpg
    228 KB · Views: 55
Just googled the part number . Def gas sensor but all descriptive details are in German . €99.95...
poss a kit offered on our vans ?? . Mines the Plus so may have been fitted anyways ... or an option ....
 
As the sensor is low down it must be for a gas that is heavier than air. So probably either LPG or that mystery gas that only French gassers know about.

Subscribers  do not see these advertisements

 
Thanks Peterc . That's sounds about right . I'll go for LPG.
Cheers
 
For greenway & others re Fiat Ducato ... Bling front end of van . See pic ...

Subscribers  do not see these advertisements


Attachments

  • 20171002_130615.jpg
    20171002_130615.jpg
    221.7 KB · Views: 80

Join us or log in to post a reply.

To join in you must be a member of MotorhomeFun

Join MotorhomeFun

Join us, it quick and easy!

Log in

Already a member? Log in here.

Latest journal entries

Back
Top