What have you fixed on your motorhome this week?

Had a local mobile motorhome engineer come round to the house and did a full gas and appliance safety test. Although I thought everything was ok, he found that I needed a new jet as the fridge/freezer was burning to hot, so a good call :clap2:

Pete
 
Hi Moonchild, I like what you have done with the vent fans there. I would like to do the same but am not very familiar with motorhome electrics. Where did you take the power for fans from. Was it from a fridge connection? Thanks in advance.
Hi Rodney, I managed to pick up 12Volt from the hab batteries on a terminal block, above the hab door, behind a panel.
 
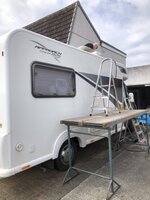
Well I actually didn’t do anything, but I got a message on WhatsApp from a buddy on Friday, who informed me he was going to repair a couple of holes in the fibreglass on the rear panel. Nothing arranged, he’d seen the damage and just decided to get on with it. Bless him, so came home to this. Brilliant job and such a great mate.
3146107D-6C85-4C81-9777-A44BB97B8EDC.jpeg
87D592BD-494B-4869-A3C0-052FB53DE1D7.jpeg
1A38D1A9-3314-4ED9-8AE4-DDCF4D21381C.jpeg
519E7036-2E5A-496D-AB17-8481D92CAB70.jpeg
 
I fitted new Hymer window open/shut straps, got them from Brownhills earlier in the week, I replaced the dining area window strap and the rear window strap, both windows now open and close correctly, I cleaned an unbelievable amount of dust etc from the channel/runner, but they’re now good

Subscribers  do not see these advertisements

 
I fitted new Hymer window open/shut straps, got them from Brownhills earlier in the week, I replaced the dining area window strap and the rear window strap, both windows now open and close correctly, I cleaned an unbelievable amount of dust etc from the channel/runner, but they’re now good

For those with the later version Hymer (ours is 2001 B680) I modified ours, I’m on the iPad at the moment and the when I’m on the pc tomorrow I’ll post some piccies

If you intend to do the same KEEP the old straps
 
Last edited:
all the window runner/channels were the same, the main problem was the lower corners, they become VERY brittle and they crack/break, mainly due to the U/V (sun). After removing the strap I'm thinking some of the problem was due to the channel being full of crap. All cleaned now, hoovered and washed out (with brake cleaner, to get rid of any "fatty" substances) If you go for this repair the black window catches break when yo get them off the strap (I was informed/advised by someone on one of the sites to use carpenters "pincers" this did NOT work !! they have to be prised off with a crewdriver) but don't worry new one's come in the kit from Brownhills, but beware they are bakelite and very brittle, as you have to bang them in with a hammer.
Anyway the piccies, the first few show the runner/channel and the crap therein, there's one piccy shows the cracked corners and the others are the fix. What I did was kept the old strap, measured and cut the strap to 7" and 8" (the corners are slightly different) as the strap fits inside perfectly, it also fits outside perfectly, I then used "Bondic" glue along the edges of the old strap, now fixed to the outside of the channel, any queries just message me
P1360012.JPG
P1360148.JPG
P1360154.JPG
P1360151.JPG
P1360002.JPG
P1360003.JPG


jobs a gudun, good luck
 
Been meaning to address the rear tow bar for a repaint for months, so started today.

On closer inspection it was apparent that I needed to remove the bar to clean and remove the rust before painting, as well as addressing the mounting brackets.

Made a start, but need to take it slow while I let the paint dry and do a proper job.

Results so far.
9A7F004F-3126-4437-BDC0-8185312836B8.jpeg
3678D0E1-D0D8-4CA2-9107-8C8434027725.jpeg
7FAB7D91-8E00-4B38-8E72-060A17C5C60C.jpeg
D5401672-2D77-4706-8802-5E6D8BE2BFE7.jpeg
0106EEBF-F002-4999-B138-3A8145D0604E.jpeg
8ED6C58C-1F86-45C4-ADF7-CBAC5C031639.jpeg
F4A0FD85-58C0-4B83-B357-4CBCA6BD60FD.jpeg
31259E97-C97C-4002-8476-03FA012D4FD1.jpeg
 
Been meaning to address the rear tow bar for a repaint for months, so started today.

On closer inspection it was apparent that I needed to remove the bar to clean and remove the rust before painting, as well as addressing the mounting brackets.

Made a start, but need to take it slow while I let the paint dry and do a proper job.

Results so far.
View attachment 398394View attachment 398395View attachment 398396View attachment 398397View attachment 398398View attachment 398399View attachment 398400View attachment 398401
Cheers for that, been looking at making a back bumper /towbar and have the same sort of mounts sticking out. Now I've seen your setup got a clearer idea of what to do.

Subscribers  do not see these advertisements

 
Not yet fitted but bought a new tyrepal setup. The discount code on this site still worked so got £19.80 off. My old one had a sender duff and they are £25 each so cheaper to get a new set up and use one of the old sensors for the spare. The new version can take up to 7 sensors so could be used for a tag or twin rear wheel setup.
 
Fitted led headlights on main and full beam headlamps , in process of fitting maxfan deluxe for extra ventilation and to keep van cool
 
Converted the water supply for the Thetford toilet flush to have its own tank. As the original supply was from the main tank there was no easy way of using the pink fluid to make the bowl nice and slippery. Added a 19litre tank with its own submersible pump, works great. Just part filling the new tank means we can travel with the main tank empty making better use of our restricted 500Kg payload. Added an external gas outlet for the barbecue and a 240v outlet socket. Also fitted a Whale watermaster inlet to make loading water from a portable container easier, no more driving over to the tap.
 
Converted the water supply for the Thetford toilet flush to have its own tank. As the original supply was from the main tank there was no easy way of using the pink fluid to make the bowl nice and slippery. Added a 19litre tank with its own submersible pump, works great. Just part filling the new tank means we can travel with the main tank empty making better use of our restricted 500Kg payload. Added an external gas outlet for the barbecue and a 240v outlet socket. Also fitted a Whale watermaster inlet to make loading water from a portable container easier, no more driving over to the tap.
Nothing finer that happy bowl liner 👍🏻
IMG_0166.JPG
IMG_0167.JPG

Subscribers  do not see these advertisements

 
Not fixed myself but fixed. Had the pod over the cab rubbed down and resprayed last week. Really good job and colour match by Ecclestone Motor Company, Maidstone. Spike the boss is a M H er himself so knows what he's doing.
On another note, just had a lovely thunderstorm and found that I got a little bit of water splashing up on the roof and dripping down inside a couple of the vent cowls!
Only happened in particularly heavy rain... any solutions. ie putting plastic bag with elastic band to secure over. But that can only be done with the aid of a step ladder. Need someone to come up
with a solution that can be applied fro ground level ??
 
I remade the solar panel connections to the Sunworks control box as I was seeing fluctuating voltages. On examination, the installer - I am loath to call him an electrician- had used sheated cable, the core being somewhat larger diameter than the Sunworks receptacle. As with the EBL problems, no attempt was made to resize the core, resulting in a cone shaped lump being squeezed into the hole! Needless to say the retaining screws weren't doing much. I've crimped some blue code pins onto the ends and all is now sweetness and light: literally!
John

I’ve just finished a similar job (originally installed by the same person as your installer methinks) whoever installed our solar panel installed the panel directly over the cable entry hole (without sealing the hole) I blocked the hole up inside but still not happy about the original installation so this week I removed the panel, cleaned the roof under the panel (filthy) reinstated the panel a few inches forward and then took the cables inside via a proper roof entry box, correctly sealed. Dumpted the original cable (with several crimp joints) reconnected the panel to the Sunworks controller. Here in Essex today it’s quite sunny and the Sunworks controller is now showing a charge of 4.5amps, job well done 👍
 
very noddy repairs compared to all you skilled craftspeople but we swapped one of the loose window struts with one from the broken window Travelworld replaced [ordeal of TV smashing inside skin of it as it came loose second trip in van] I asked for old window back to make a cold frame .
I have replaced the outside door retainer AND [woo woo] I have put in a new, clean sink trap thing [still reeling from the cost of this I must admit as it is a series of plasticy/metal things ] and cleaned the pipes leading from the trap to the waste and IT DOESN'T LEAK . now an early G and T to celebrate plumbing skills and the fact it has stopped raining....

Subscribers  do not see these advertisements

 
Bought some 8mm X 40mm dowels and a one-shot delamination kit from Amazon to repair the rear floor area. Have to say I'm happy with the result, floor is rock solid now. Less than £25 to repair and easy to do, just as well as I'm not a DIY expert by any stretch of the imagination!
 

Attachments

  • IMG_20200615_201108.jpg
    IMG_20200615_201108.jpg
    109.1 KB · Views: 98
Fitted led headlights on main and full beam headlamps , in process of fitting maxfan deluxe for extra ventilation and to keep van cool
Hi there. Which Maxxair do you have ? Is it the Deluxe version remotely controlled and tinted top? Sorry I have been told there are two or three versions?
Trying to get some information on one before we take the plunge! Are they good enough?
regards Kev
 
Not fixed myself but fixed. Had the pod over the cab rubbed down and resprayed last week. Really good job and colour match by Ecclestone Motor Company, Maidstone. Spike the boss is a M H er himself so knows what he's doing.
On another note, just had a lovely thunderstorm and found that I got a little bit of water splashing up on the roof and dripping down inside a couple of the vent cowls!
Only happened in particularly heavy rain... any solutions. ie putting plastic bag with elastic band to secure over. But that can only be done with the aid of a step ladder. Need someone to come up
with a solution that can be applied fro ground level ??
Need to have the same done on my over cab laquer all pealing was it very expensive?
Steve
 
In the scheme of things I guess it was expensive at £800. But they had it for 5 days, rubbing down, repairing and filling where needed and a perfect respray. At the end of the day the bubbling paint was driving me potty so I'm happy with the result.
 
I know what you mean mine winds me up every time I look at it. I had a local body shop respray front bumper last year that cost nearly £500 He is only 1mile away I have been waiting 2 weeks for him to have a look at it as motorhome is sorned and he said he would come up so looks as if I will go elsewhere.
 
Fitted a new external temp sensor in wing mirror
Did you use a generic type thermistor, or did you manage to find a Fiat Replacement part?

I could only find one listed for the Fiat 500...is it the same?

Do you have any details please?

Subscribers  do not see these advertisements


Join us or log in to post a reply.

To join in you must be a member of MotorhomeFun

Join MotorhomeFun

Join us, it quick and easy!

Log in

Already a member? Log in here.

Back
Top