Another few weeks.

Hi Robert

Not long after I posted, I bit the bullet and cut 2 25mm hole (hole cutter on drill) in the base of the cupboard to feed the TV power and aerial cables through.
The cupboard base is made from honeycomb board, likely a weight saving exercise.
I will likely move the TV bracket to the wardrobe side wall is9me time, as it takes up a lot of space when watching the TV, and still when folded closed (upwards)
At least you found a solution that suits you best.(y)
 
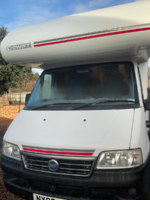
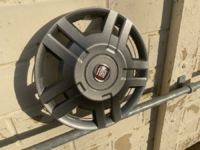
Sprayed the four wheel trims and the front grille with the sealer to be honest it was clear and shinny but when it dried it is dull and one could not tell it was done.

still got on with a bit of sanding the side skirts and the rear bumper plastics.
got fed up with that fast so will finish it tomorrow and may get the sealer coat on that as well.
 
Shinny shinny well four wheel trims and the grille spayed in Anthracite metallic .
the wheel trim is so shiny I had to turn it away from the light to take a photo so it does look flat in the image but it’s not.
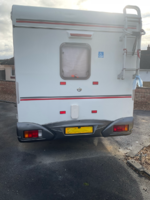
the skirt and rear bumper still taped up so on with that and then the Herzim strip.
so busy again today.
 

Attachments

  • PNG image 2.png
    PNG image 2.png
    1.8 MB · Views: 32
  • PNG image.png
    PNG image.png
    1.3 MB · Views: 30
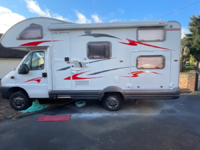
Well that’s the out side finished apart from some sort of quadrant trim over the top of the wheel arches and the rear bumper.

on with all the underside stuff later,

Subscribers  do not see these advertisements


Attachments

  • PNG image 3.png
    PNG image 3.png
    1.7 MB · Views: 43
  • PNG image 4.png
    PNG image 4.png
    1.2 MB · Views: 37
  • PNG image 5.png
    PNG image 5.png
    1.3 MB · Views: 37
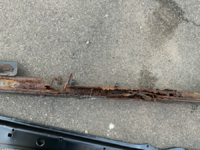
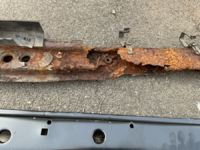
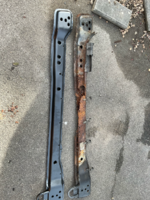
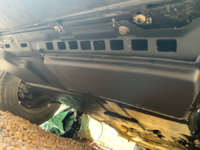
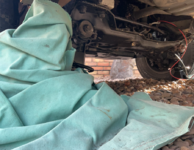
So the front lower cross member has now been changed.

what a mess on as every time i touched more rust kept falling on me.
yes I think it needed changing.. I think the mot advisor said slight rust…
but it is another job done on the list today.

and the oil change and new oil filter. Just have a little more oil to put in but thought I would wait till it was back on the floor instead of jacks and axel stands. It takes 6 ltrs according to the manual so I have another ltr to put in.

anyway wax oil to continue all underside started but miles more to go then the engine undercover to fit and a few small works.
so again another few weeks..
 

Attachments

  • PNG image 3.png
    PNG image 3.png
    1.6 MB · Views: 38
  • PNG image 2.png
    PNG image 2.png
    1.5 MB · Views: 34
  • PNG image.png
    PNG image.png
    2.7 MB · Views: 36
This is all looking excellent. I’ve not seen so much love given to a Motorhome. She is looking very smart. 👍
 
This is all looking excellent. I’ve not seen so much love given to a Motorhome. She is looking very smart. 👍
Thanks we’re nearly finished now another few days underneath with wax oil and the plastic engine protector and we should be very near to finishing if not finished.

then the fun should be able to start…..worry free…..

just trying to think of a name for it now the only suggestion so far is. Swifty

and most certainly another few weeks.

I really can’t understand why the chassis is all in good condition yet the front lower cross member should be in such a bad condition.
nothing else is. The new one has been well wax oiled both inside and out.
 
Last edited:
Thanks we’re nearly finished now another few days underneath with wax oil and the plastic engine protector and we should be very near to finishing if not finished.

then the fun should be able to start…..worry free…..

just trying to think of a name for it now the only suggestion so far is. Swifty

and most certainly another few weeks.

I really can’t understand why the chassis is all in good condition yet the front lower cross member should be in such a bad condition.
nothing else is. The new one has been well wax oiled both inside and out.
The front beams I believe weren’t painted to the same quality as the rest of the chassis/body. Luckily the rest of the van wears much better.
Once finished, you could call it All Done. 😂😂

Stay Safe PaulandChrissy
 
Plastic engine underside protection fitted today. A small amount of waxoil to go and a few very easy jobs and it will be done so from a few weeks to a week depending on weather

Subscribers  do not see these advertisements


Attachments

  • PNG image 3.png
    PNG image 3.png
    1.3 MB · Views: 35
  • PNG image 4.png
    PNG image 4.png
    1.6 MB · Views: 39
You won’t know what to do with yourself once it’s finished.
 
What a list ..

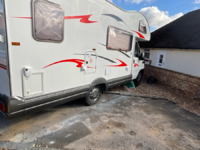
Well here we go. It’s been somewhat of an adventure since we bought our
Fiat ducato swift Sundance 600B 2003 Moho.

I say adventure we have not been anywhere in it yet.
With a confirmed dvla of 19 k mileage .

A lot of jobs that needed doing and some that had to be done others just to put our own stamp on it.
Additions and improvements and essential items.

So all said and done it’s had a bit of a refurb.

We bought it knowing there was a bit to do to it and we were happy to take it on.

It’s not new its paid for and.
I Don’t mind if I get a few scratches or scrapes.

So here’s our list that seemed to go on and on.
Another few weeks. In fact turned out to be 11 weeks in total.

Fitted front parking camera.

Fitted reversing camera.

Fitted plug and socket into dashboard so as to run the reversing camera monitor.
Nothing will be on display when parked .nothing to show there was anything there to start with.

Replaced All the interior lights with led lights and added a few.

Added a led strip light in the garage area.

Added a few interior 240 volt sockets and one inside the garage area.

Added two 12 volt cigar sockets. To the under seat area under cab seats.

Added a twin set of usb outlets to the side of the cab seats.

Wax oiled the entire underside .

Cleaned and applied underseal to all four wheel arches.

Changed high level brake lights for led strip light. And painted moulding.

Added security dead locks inside on both cab doors.And habitation door.

Secret safe fitted..

Replaced gas locker air vent.

Replaced awning skirt rail . From plastic to alloy.

Replaced three Fiamma dead locks. And added another three to anything that opens with a key.

Solar two roof panels charging for two habitation batteries and the main starting battery.

Fitted an additional 95 AH battery and replaced the other for the same.so now two habitation battery’s.

Removed bike carrier and fitted 4 small reflectors over the existing mounting holes.

Steel finger plates fitted to all the opening cupboards.

Replaced exterior graphics .

Fitted and wired new microwave oven.

Fitted removable hi vis window locks. Can be removed but only from inside.

Removable tv. And Sound bar brackets. Made twin 12 volt cable to match And has a hanging bracket .

New interior carpets.and underlay Upto cab area.

Renewed cab mat for non slip rubber made to fit for the Fiat Ducato.

Fitted sound proofing to the floor inside all lower habitation units then carpeted.

Replaced one fridge exterior vent locking buttons.

Renewed All the plastic herzim trim.

Installed led lighting to garage area.

Fitted external 240 volt awning socket.

Replaced broken 240 volt hookup supply box and socket.

Fitted a new twist and lay flat kitchen sink tap.

Repairs made to habitation heater.and igniter.

Replaced all the lock barrels with a suited set so as to reduce the amount of existing keys.

Replaced two trim corners. That used to be just a blob of sikaflex.

Replaced damaged rear bumper part. Later to be resprayed.

Driver and passenger seats re trimmed. (. Not by us )

All upholstery including all panels reupholstered.

New curtains and all fully lined as replacements. Inc tie backs.

Added another two curtain tracks. And curtains.

New cab radio with Bluetooth for mobile phones.

new front lower cross member.

Renewed front brake pads.

Renewed both rear suspension bump rubbers.

Fitted new underside plastic engine protector.

Repairs to wheel arch needed new steel and welding.
Welding repair to a non structural outrigger.

under seal to all wheel arches .

Some rubber seal trim to the top of the rear bumper and both wheel arches.

Secured all underside wiring using plastic cable clips and stainless steel screws and removed cable ties as were existing.

A set of new reg plated.

Resprayed rear bumper and side skirts. Along With wheel trims and front grille all plastic parts with plastic sealer paints.

Full engine service..

Removed a lot of redundant wiring from previous installations of assorted items.

Numerous other little bits that needed tidying up and fitting properly. Mainly wiring….
Now looking as new as it can get.for a 2003

Removed all the exterior graphics and adhesive.

Cut and polished the motor home exterior. And applied new graphics.

And had a stage 1 ecu remap some might not agree with this but been done now but can be reversed if required.

So this is now ready for a few weeks away. This does not include anything that we have made for the camping side of trips.

This has Not taken as long I thought it would. What with weather and an age thing
still I hope I am finished now for this year anyway. Still it was never a race.


Things to do later

Having now said that it may be done sooner rather than later.

New rear exhaust box.

Renew timing belt and water pump.


anything I may have missed ??
 
You will realise what you have missed the first time you go away, that's how motorhoming works 🤣🤣


Excellent job 👍
 

Join us or log in to post a reply.

To join in you must be a member of MotorhomeFun

Join MotorhomeFun

Join us, it quick and easy!

Log in

Already a member? Log in here.

Latest journal entries

Back
Top