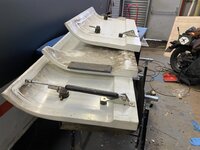
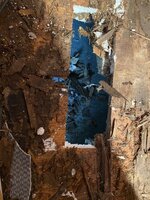
Replacing rotten flooring on Hobby 750 fmse 2001 (2 Viewers)

Bealzebug

Free Member
Sep 1, 2018
12
13
Funster No
55,964
MH
C class
Exp
Newbie
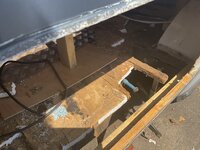
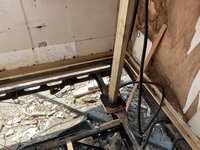
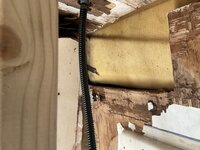
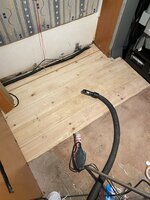
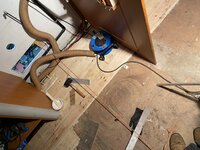
Progress is a little slow with the 750 floor, but it’s coming on. West System Epoxy has arrived including microfibres for thickening.
Made and installed bottom wall plate from rear wheel arch to back corner and the first floor edge timber is now bonded to it.
I painted all timbers with West System using 4” foam rolllers, then after thickening a new batch of epoxy bonded the timber to the lower wall.
8BA6669C-8F0D-4526-AB59-EEB96EAD5822.jpegEB98A6B1-191B-4F05-826B-14ABD6178424.jpeg
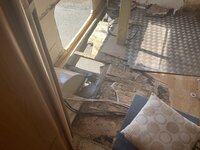
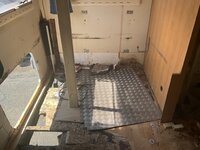
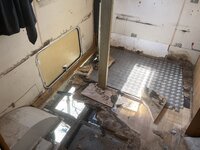
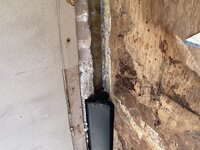
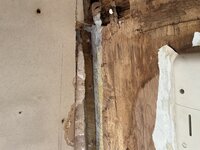
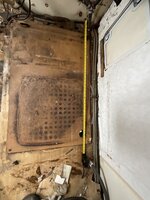
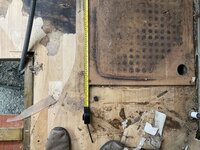
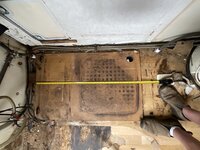
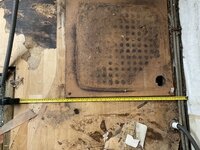
A few more pics from inside. Started removing the floor bit by bit to leave myself a working platform inside.
Now the wall plate and first floor timber are in a firmly bonded, I am going to remove the section of floor surrounding the wheel arch and over the grey water tank. Once removed my next steps will be to layup 6mm ply that has been sealed completely with epoxy to form the bottom of the floor sandwich. Once this is in I will bond timber floor joists onto the base floor, infill with foam insulation 25mm thick and then laminate another 6mm ply to top the sandwich off.
7CA1033E-BB5D-45DB-852E-BCBB8036EC52.jpegF14666A7-E9DA-4085-A618-ECE861B550B8.jpeg142B5F69-4C06-44D3-B29D-FFC385A1AD92.jpegMore fun next weekend,
 

TheBig1

LIFE MEMBER
Nov 27, 2011
17,644
43,457
Dorset
Funster No
19,048
MH
A class
Exp
many many years! since I was a kid
Now that is an absolutley spot on job. When finished it will be watertight and far more substantial than the original
 

Bealzebug

Free Member
Sep 1, 2018
12
13
Funster No
55,964
MH
C class
Exp
Newbie
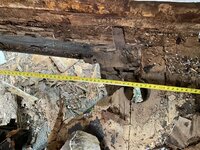
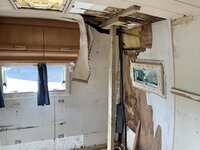
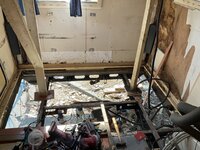
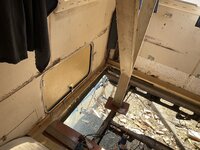
Took a weeks annual leave to get on rectifying the rot. The rebuild has now started after chasing rot and cutting it out. The hobby is propped inside as per The Big 1’s recommendation and I have also propped the back wall with 50mm x50mm box section steel, scissor jacks and axle stands. All wall plates have now been built up and bonded with west system epoxy to the aluminium walls.
I started trying to do a small patch at a time to retain structural integrity however rot was so extreme particularly close tO tHe wall bottoms that there was no structural support left.
852580EE-B36A-47FA-A8B0-E1AF7B1AA3CF.jpeg249D088F-F61D-47F1-B5C7-D5F2F8156A83.jpeg8FE185F4-5B44-4BD7-91CA-7A5F28C1A800.jpeg7E2E4B3F-8336-4B7D-A412-CE7F12A2E364.jpeg204F4100-1D3F-477E-97C5-2F0E8A6D18D9.jpeg00F11702-0871-4BE9-A2D2-B118E62B91D9.jpeg5736FFA4-6BEE-4B1D-82DA-44790BBCFAD0.jpeg1011BF67-66A4-41D2-80D3-55FA3DF3DAD5.jpeg663F91A0-59B0-4A74-9BEF-B839304DCC33.jpeg13695EDD-B3DA-4299-94B4-CD50219AB4AA.jpeg3A5F9865-DB6B-4F74-BF69-7B70FB07FBFD.jpegAA418EFE-A266-4E6B-AF13-F7326ACA9750.jpeg9D0828F9-74E1-4047-AE52-CB9F5461E4F1.jpeg
Does anyone know if the extra board in the bathroom is standard or has this been added during a previous repair To strengthen the floor under the shower? If this is a previous repair it was a lot of work to put it in especially considering the floor movement was due to the floor not being attached to wall!
84DDB4CA-9185-436F-A40F-A51B3488D2AD.jpeg170DF530-4811-44A6-96A5-C2B74C0BE3FA.jpeg49CB2552-2425-4CE9-BADD-67857DC90B22.jpeg990B3BB8-A9A5-44EE-BC1C-4C30E83EEFBF.jpeg
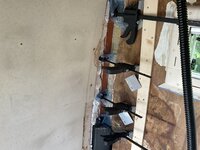
Today has been spent laminating up new curved wall upright timbers for the internal corners at the back. I Used 5.5mm hardwood ply fulled sealed in epoxy. The corners are complicated as the Hobby barrel shaped body is also curved on the back elevation making the corner uprights compound bends. I can confirm flexi ply is not needed as the bends are quite shallow normal ply works fine.
I choose to laminate insitu rather than making a wooden form. Without exerting too much pressure I was able to bend 4 pieces of ply stacked on top of each other using the existing wall as the form. The clamps come off tomorrow so I’ll know if it worked then!
I‘m looking forward to finishing the corners so I can then rely the floor and the strength will then be restored. All floor panels are cut ready to be slotted in, can’t wait!
 

TheBig1

LIFE MEMBER
Nov 27, 2011
17,644
43,457
Dorset
Funster No
19,048
MH
A class
Exp
many many years! since I was a kid
More rot in that floor than wood. It's a miracle nobody put a foot through it

The board under the shower definitely looks like an old repair
 

Bealzebug

Free Member
Sep 1, 2018
12
13
Funster No
55,964
MH
C class
Exp
Newbie
More rot in that floor than wood. It's a miracle nobody put a foot through it

The board under the shower definitely looks like an old repair
TBH It was only the 1.5mm layer of wood effect vinyl flooring bonded edge to edge that kept the floor together. As soon as this was removed most of the floor was not safe to stand on except for the centre at the back which after inspection was still 100% perfect.

Subscribers  do not see these advertisements

 
Oct 27, 2019
284
2,211
Fareham
Funster No
66,290
MH
C class
Exp
Since 2017
TBH It was only the 1.5mm layer of wood effect vinyl flooring bonded edge to edge that kept the floor together. As soon as this was removed most of the floor was not safe to stand on except for the centre at the back which after inspection was still 100% perfect.
Hope you kept that bit then. Save 20 pence on wood.
That might be the Yorkshire coming out in me.
 
Jan 6, 2018
99
102
Funster No
51,880
Hi just to say I purchased a Hobby 750 March 2001 registered December 2017 and have already done 4000 miles and loved every minute! But alas found a few water ingress problems:( Boiler had gone through the floor, that looked like a heat problem and water ingress as I found a damp patch under the settee. Took boiler out and fixed all that and any rot I could not get to I covered in under-seal bitumen. Put it all back together then found the floor under the shower tray rotted so replaced all that and took off all the bathroom panels and found no further leaks. Sealed plug in the tray properly as this was loose and replaced a panel under the van below the shower outlet pipes and gave several coats of underseal on all joints and where sealant was. Now I find the floor is rotten in a small area underneath the van in the corner where the water filling flap is. I did have a leaking sureflow water pump next to the water tank inside the van which I fixed so this could have been the cause. Any advise would be great! I live in Weston Super Mare and paid top money for the van as it only had 30,000 miles and had been kitted out with many extras for off grid living including 3 x solar panels etc. I have patched the flooring underneath the van where it was rotten and then treated with bitumen underseal. I suppose really I should have stripped the interior out on the side of the van where all the water pipe work is so I could replace the flooring from above and not patched from below? Anyone else had a similar problem on a motorhome.
I think I might have already mentioned this. We bought a hymer about 6 years ago and after about two years found the floor was rotten by the step which started rocking when used. Hubby repaired and thought leak was in roof along join over cab . Eventually found out it was where the awning had been badly fitted and water was getting in down the side of a bolt. Have now fixed that and keeping a very close eye on wall around door and floor🤞. Annoyed that the previous owner kept it in a barn to ensure it was completely dry before selling.
 
Feb 24, 2020
45
40
Funster No
68,975
MH
coachbuilt
Exp
since 1974
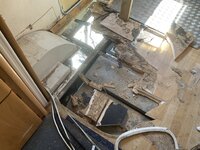
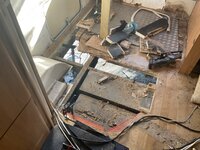
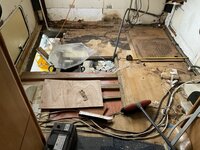
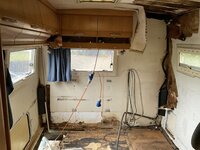
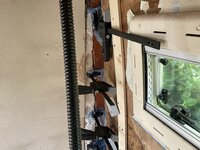
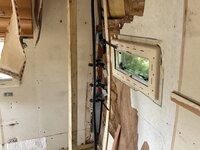
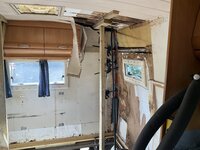
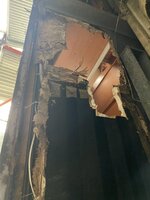
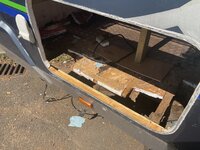
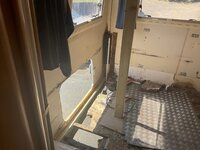
Apologies, I should have posted alot sooner, but better late than never!. As can be seen from the pics there is no easy quick fix to this problem. The extent of the rot ran right through the floor and sole plates. I haven't even begun the blog, thats going to take some time! But here's a taster for ye anyway. Any questions just ask away.

:-(
View attachment 315792

:-(
View attachment 315793

:-(
View attachment 315791

:-(

View attachment 315794

:-(

View attachment 315795


:-(
View attachment 315796


:)
View attachment 315797

:cool:

View attachment 315798
What a fantastic job you have made. Well done !
 

Bealzebug

Free Member
Sep 1, 2018
12
13
Funster No
55,964
MH
C class
Exp
Newbie
Today was 30+ degrees in the Hobby MH. Well that’s my excuse for finishing early!
923F8E56-CE18-4007-8135-954773EA36A6.jpeg1600287B-C469-4F5F-81FC-F0FDB3857489.jpeg0254AB1D-F078-4B12-B5C2-471A1AC5A6C7.jpegA6AD2688-6301-47CC-938F-936CBFEF5DBC.jpeg
The near side rear corner is all clamped up with new timber. Thinking of using 2.5mm hygienic pvc sheet instead of ply for the shower walls once all the rot has been removed and replaced, any reason this would not be suitable?
Just the os rear corner to laminate up now and I can put the floor back in! Fingers crossed the floor should be done in two weekends time!
 
Oct 5, 2022
19
29
Altrincham, UK
Funster No
91,716
MH
Geist Phantom
Exp
2005 had a motorhome had a gap now back
Hi just to say I purchased a Hobby 750 March 2001 registered December 2017 and have already done 4000 miles and loved every minute! But alas found a few water ingress problems:( Boiler had gone through the floor, that looked like a heat problem and water ingress as I found a damp patch under the settee. Took boiler out and fixed all that and any rot I could not get to I covered in under-seal bitumen. Put it all back together then found the floor under the shower tray rotted so replaced all that and took off all the bathroom panels and found no further leaks. Sealed plug in the tray properly as this was loose and replaced a panel under the van below the shower outlet pipes and gave several coats of underseal on all joints and where sealant was. Now I find the floor is rotten in a small area underneath the van in the corner where the water filling flap is. I did have a leaking sureflow water pump next to the water tank inside the van which I fixed so this could have been the cause. Any advise would be great! I live in Weston Super Mare and paid top money for the van as it only had 30,000 miles and had been kitted out with many extras for off grid living including 3 x solar panels etc. I have patched the flooring underneath the van where it was rotten and then treated with bitumen underseal. I suppose really I should have stripped the interior out on the side of the van where all the water pipe work is so I could replace the flooring from above and not patched from below? Anyone else had a similar problem on a motorhome.
I bought a motorhome and have replaced the floor from the front to the back, on the part that was rotten and even in the side panel digging out all the bits and replacing with new wood. Took all the fixtures out (seats kitchen, cooker, fridge, benches) apart from the support arches and the boiler which was luckily hovering on a shelf in the cupboard. Jacked the body up and had lots of supports in. When we bought it it seemed ok but they had inserted metal plates under the flooring hidden which disguised the damage. Also had to remove all the side locker and take the joints off as they had seized loosen them all off and resettle some of them, replace some struts and replace, then did a patch of delamination kit by the doorway/sink area, we did put some extra girders across and some extra struts just to belt and brace it. I have discovered my husband has some nifty devices in his garage that make life a lot easier, but it was a torturous job took 6 months to strip it down and redo it over winter.

IMG_3631 2.jpeg IMG_4912.jpeg IMG_4909.jpeg IMG_4932.jpeg IMG_5027.jpeg IMG_5028.jpeg IMG_3121.jpeg

Subscribers  do not see these advertisements


Bealzebug

Free Member
Sep 1, 2018
12
13
Funster No
55,964
MH
C class
Exp
Newbie
Hi all, I am now getting to the stage where I am thinking about applying new wall boards to the polystyrene and need some advice in regard to adhesives.
I have been using West System epoxy for wood to wood and wood to aluminium and GRP, can I use the same stuff for layering up the wood-insulation-wood sandwich for the floor? And the same for the walls When fixing new wall boards. I read that some people use a single pack panel adhesive like sikaflex 522 and others use 2 pack polyurethane adhesives. Which is best Or will the West System be fine?
I would like to try to avoid leaving any voids so I’m thinking a spreadable 2 pack will be best, however sikaflex etc allows do flexibility in the materials and will not crack.
I have roughly 150 sq feet of adhesive surface to cover in total.
Any advice?
cheers
Matt
 
Feb 20, 2024
2
1
Funster No
101,369
MH
Hobby 750
I'm currently renovating a 2001 Hobby 750. The rot was so bad in the floor, mainly due to water ingress from the wheel arches. I stripped out the whole interior of the motor home, propped the shell with acrows from the suspension. Completely ripped out the floor, replaced with a resin plywood sheet on galvanised u-struts, bolted to the main chassis. Replaced the timber sole plates of the shell with teak hardwood and around the main door. Refitted and resealed all the windows, rejoined the motorhome shell to the drivers cabin. After the xmas holiday period I'll refit the interior. Its one of a kind now! Ive pictures of the progress I made and I hope to write a blog about it!
 

Join us or log in to post a reply.

To join in you must be a member of MotorhomeFun

Join MotorhomeFun

Join us, it quick and easy!

Log in

Already a member? Log in here.

Latest journal entries

Funsters who are viewing this thread

Back
Top