Ralph n Bevs...... Panel Van Conversion

AFAIK the Peugeot 2.2 is chain but the Fiat 2.3 is belt (which we have).

Thats good news, i will probably go with the 2.2 engine

Thanks for the info.....Ralph
 
i can understand this is a problem when retro fitting but building from scratch theres ways around it.Windows can be recessed and the over lap on rooflights can be extended with a white plastic sleeve i will point out that on a ducato if you fit the blind cassette on the face of the sliding door it will not clear the rear of the opening when the door is slid back dont ask how i know just belive me

:rofl::rofl::rofl: Say no more.....
 
We have an Autocruise Accent which has a half dinette up front and a rear lounge/fixed bed configuration so is different from the norm which usually only have the option of a fixed bed at the rear. However, due to its being meant to be used in lounge form too, in order to accommodate comfortable seating - no dangling legs due to the height of the seat/bed base - the whole of this area has a raised floor which runs completely from side to side and back to front which gives lots of storage underneath in the middle walkway and a double height lot of storage under the seat bases:

Centre: This large underfloor area has a flap on the front end and a slide up 'cover' at the rear (we leave this out anyway) and accommodates two large inflatable canoes as well as paddles, life jackets, barrel, pump etc.

Offside: our 2 leisure batteries are located in the lower section which has a removable access cover, and the upper section has the electric unit at the front end within it (daft place!) and provides a large storage area; at the end nearest the door is a full height gas locker with access door on the rear which can accommodate a single 13kg bottle or two 7kg ones (if it had been just a touch bigger it would have accommodated two 13kgs!).

Nearside: the lower section goes the full length of the seat base with a drop down flap on the end (back to front) so is ideal for our folding chairs (the 'tube' type, not flat), awning, walking poles etc which just slot into it; above this is a large storage area which takes loads of kit with the boiler being in a sectioned off part nearest the rear door (the boiler would have been better at the front end of the seat base instead with the large storage area at the rear to allow easier access via a door ... I may move this once it's out of warranty ;) ) .

Our fresh water tank is only 66L and is external, however the mainland EU rear bed versions have an inboard fresh water tank which is located either under the half dinette seat (not applicable for you I know) or more commonly in the rear at one side - if you have the chance have a good shuftie round some of them (Globecar/Possle/Adria) and you'll see what I mean - this would solve your water tank insulation dilemma and leave the underneath clear for a larger waste tank and/or gas tank. I'm considering adding an extra water tank (either inboard or external) and/or replacing what we have as whilst we manage with 66L a bit of 'extra capacity' would be useful.

Thats a very interesting layout you've got there. Sounds like you have some very useful storage space....Rare on panelvan conversions.
We are looking to fit 90L fresh water tank underslung with a manual heater element. I am also going to rig a temporary internal tank under the rear lounge bed space.This will only be fitted and used if we go off in very cold weather.
Should be easy enough using service valves and tee connectors from the internally mounted pump.

Thanks for the detailed post.....Ralph
 
One of the problems with PVC conversions done by the mainstream converters is lack of storage, this was something that I was keen on having.
One of the best ways is to create a storage area at the back.
This can only be done with a rear traverse bed which we required, one reason being is that we spend 4 months in Spain during winter.
Image00001.jpg
 
One of the problems with PVC conversions done by the mainstream converters is lack of storage, this was something that I was keen on having.
One of the best ways is to create a storage area at the back.
This can only be done with a rear traverse bed which we required, one reason being is that we spend 4 months in Spain during winter.
View attachment 37675

Hi Mikeco, i can see where you are coming from creating storage under the rear bed area.
We are going rear u shaped lounge but it will be two fixed single beds. The floor in this area will be raised around 150mm to create more storage and deeper bed bases. I won't have the luxury of 4 months off just yet so it will be long weeks here and there so should easily manage with the storage space i intend to create. I like how you have blanked off the back end creating an area for the table and chairs. Dont think i would like not being able to see through the rear doors whilst driving.
Thats the beauty of creating your own model ...you only fit and build what suits you (y)

Subscribers  do not see these advertisements

 
Having towed a caravan to Spain not being able to see through the van is no problem and the side mirrors on these vans are very good. I also have a rear view camera so I can keep a look out for the Barcelona bandits.
The centre part of the rear bulkhead is hinged so we can use it as an escape route if we had to.
Before you finalise your design just have a think where you will carry the following:
Chairs
Table
Barbeque
Windbreak ( If you need one )
Awning mat ( If you need one )
Levellers
Cut up bread baskets
10 l water container ( to fill up on board tank )
Fiamma waste container ( to empty on board tank without moving)
Toilet fluid
Hook up cable
Fiamma awning handle
Silver screen


All of these fit in the back along with 3 plastic boxes which hold a few tools, food and bottles.

Mike
 
Also by blanking it offstop draughs in winter, but nice if can open it for summer, i am sure you could design something for both.
 
Having towed a caravan to Spain not being able to see through the van is no problem and the side mirrors on these vans are very good. I also have a rear view camera so I can keep a look out for the Barcelona bandits.
The centre part of the rear bulkhead is hinged so we can use it as an escape route if we had to.
Before you finalise your design just have a think where you will carry the following:
Chairs
Table
Barbeque
Windbreak ( If you need one )
Awning mat ( If you need one )
Levellers
Cut up bread baskets
10 l water container ( to fill up on board tank )
Fiamma waste container ( to empty on board tank without moving)
Toilet fluid
Hook up cable
Fiamma awning handle
Silver screen


All of these fit in the back along with 3 plastic boxes which hold a few tools, food and bottles.

Mike

The storage does concern me a bit coming from a coachbuilt with loads of it.
I realise one or two bits may have to go, i can even see the latest chairs we have traveling in between the beds and under the van or cab area when parked up. we have spent some time in the prefered layout and believe we can do it.

Think i will start packing with a couple of cases of ale and see what we have left :LOL::LOL:

Ralph
 
Also by blanking it offstop draughs in winter, but nice if can open it for summer, i am sure you could design something for both.

Vantage Motorhomes have come up with a clever Draft excluder for their van conversions, its a thermal strip fixed over the gap in the two doors, I will be copying the idea (y)
The new facelift on the Ducato type of van is not the only change apparently they have improved the sliding mechanism on the large side door, This may help with drafts if it closes better.

Ralph
 
Having towed a caravan to Spain not being able to see through the van is no problem and the side mirrors on these vans are very good. I also have a rear view camera so I can keep a look out for the Barcelona bandits.
The centre part of the rear bulkhead is hinged so we can use it as an escape route if we had to.
Before you finalise your design just have a think where you will carry the following:
Chairs
Table
Barbeque
Windbreak ( If you need one )
Awning mat ( If you need one )
Levellers
Cut up bread baskets
10 l water container ( to fill up on board tank )
Fiamma waste container ( to empty on board tank without moving)
Toilet fluid
Hook up cable
Fiamma awning handle
Silver screen


All of these fit in the back along with 3 plastic boxes which hold a few tools, food and bottles.

Mike

Wow Mike, you carry a Fiamma waste container in a panel van conversion.

Paul.

Subscribers  do not see these advertisements

 
we have a transverse bed at the rear and huge storage below our bed is open to the rear as we like to be able to air the van out by opening all the doors
 
Wow Mike, you carry a Fiamma waste container in a panel van conversion.

Paul.

The underneath tank is only 45 litres and as we are often parked up for a week or more it's very easy to empty it. Very useful in Spain where we have a serviced pitch.

Mike
 
The underneath tank is only 45 litres and as we are often parked up for a week or more it's very easy to empty it. Very useful in Spain where we have a serviced pitch.

Mike

Mike why don't you carry a length of hose and just drain off the grey using this.
That's presuming your pitch has a drain nearby.

I have started using this method to empty out after weekends away, had to adapt the outlet to accept a hose
but its so easy.
 
theres no usefull view out the back of most pvc's as usually you have the bathroom in the way
 
Mike why don't you carry a length of hose and just drain off the grey using this.
That's presuming your pitch has a drain nearby.

I have started using this method to empty out after weekends away, had to adapt the outlet to accept a hose
but its so easy.
I have that option also when it's a viable option but when parked up I like to keep it nice and easy when moving off site for the day. This is why all chairs, tables ect. have a storage home and the only connection I normally have is the EHU cable.
We will be in France for 5 weeks late August /Sept. and we could be parked up for a week on a non serviced pitch and it therefore comes in very handy. We will also be parked up at the Malvern Show for 4 days and the best way to empty the waste at such places is via a mobile tank,


Mike

Subscribers  do not see these advertisements

 
I love slobbing on the bed (with the dogs usually!) doing my puzzle book after tea whilst hubby washes up and/or does his planning for the following day at the front of the van ... you can't beat being able to open up the rear doors and let the fresh air in - it also means that making up the bed (changing sheets especially) is a doddle. something which our van has which very few rear bed PVCs have is a window on the side at the rear - this means that when in bed we don't feel hemmed in and can have our morning cuppa whilst looking out at the view (we also have windows in the rear doors too).

I'd re-think the height of the raised floor though, 15cm isn't a lot - we have around 25cm and it's brilliant, anything less and the van wouldn't have been suitable for us.

Below is a link for another forum which has some more info on about our van and the mods etc I've done (no competition for this one Jim so don't worry!):

https://www.outandaboutlive.co.uk/f...Oh-heck-Accent-on-an-expensive-day-/28634/61/
 
Just seen this thread so thought I'd add a few pictures as my van seems to be the layout your thinking about.

This is the layout I was originally planning:

Motorhome_Design_Layout.gif


And here are a few pictures of how it now looks:

IMG_4555.jpg


Broken Link Removed

I decided that, with the u-shape lounge, the rear door would be next to useless so boarded off across the back but kept the rear windows. This finished the back off nicely and gave a boot under the rear seats:

Broken Link Removed

One thing I did do was stagger the sides of the rear lounge with one side 2m long and the other 1.7m. As I'm 6' and my partner .... isn't ;) we still get two single beds to crash out on during the day if we want to, but it freed up more space for the cooking area and at the front of the van. Because of the stepping it makes the van more accessible and spacious, even with a large bathroom and wardrobe. At night the bed can be pulled out to create a huge double:

Broken Link Removed

Just one other point - a white van will be cooler in the Summer.

This was very important to me as my dog likes to stay in the van if we go out for a few hours. Our van in insulated with Kingspan all over and last week we were in Poole during the heat wave there. I popped back to the van every hour, as it was so hot outside, but it was always nice and cool.

I know of a few other self builders that have used nice coloured vans, insulated them to the hilt, but they still get massively hot. I know one guy that is having to fit big fans in his floor to aid airflow.
Might be worth considering, especially if you have pets.
 
Hi Wissel, Thanks for taking the time to upload the pictures. I did have a load of questions to ask you and then i saw the blog ......Three hours later after viewing it all my questions are answered. I hold my hat off to you doing a blog and a van conversion at the same time...Well done its a great blog and a very nice conversion. I was going to ask you how you got such a nice finish on the doors but i believe you have a kitchen company, very handy (y)

I love how you did the rear panel with the blinds on and the full size window in the door.Can you still open the rear windows from inside the van ? One thing we really liked on one or two of the professional conversions was the full back insulated panel with locker door replacing the two full doors. This meant you could access the under bed storage without losing heat from the van in the colder months. This method you have done is almost doing the same with the internal blinds down. Do you have any problems with the blinds sucking out when the rear door is open ?

I think i will be doing this on our rear u shaped lounge (y)

One quick question that's been bothering me..... When you board the ceiling do you follow the curvature of the van roof or do you pack it out to make it flat ?

Thanks.....Ralph
 
just a few things i would do if doing another
i would go as flat as possible makes fitting furniture easier
not that i did
half way through the build i was at magnums and saw then building a van and had a little chat basically what they do is panel the van out as flat as possible doesnt have to be upright ie the walls can slope but keep it flat
they actually use quite cheap 6mm ply for the walls then glue finished 3mm boards or carpet /vinyll over that
if you go down the ducato/boxer route theres a natural break at the top of the walls as there is a beam that sticks out take the walls up to the beam and the ceiling flat above it and cover the gap with an angled fillet piece this leaves a void thats ideal for wiring etc

Thanks Mitzimad, I thought the ceiling would be better flat for rooflight frames and like you say fixing cupboards.
I also like how some straighten up the walls from the floor to just below the lounge windows, they then finish off with
a small handy cill / shelf. Something else i will consider when building ;)

Subscribers  do not see these advertisements

 
Thanks Mitzimad, I thought the ceiling would be better flat for rooflight frames and like you say fixing cupboards.
I also like how some straighten up the walls from the floor to just below the lounge windows, they then finish off with
a small handy cill / shelf. Something else i will consider when building ;)
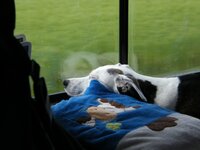
We've got windowsills in our camper and they are very nice, giving it a homely feel, good to put bits and pieces on and most importantly our dog Romy likes to travel laid down in the corner of the dinette seat with her chin on the sill so she can still look outside or snooze. We also love our sliding windows in the front lounge as we can travel with them open to let air into the van (the dogs love this!) and they are useful when wanting to shake the crumbs off the table cloth or empty the water out of the salad spinner etc without having to open the door (useful when raining!).
 

Attachments

  • romy on windowsill.jpg
    romy on windowsill.jpg
    53.2 KB · Views: 42
Hi only just picked up on your thread (been away at Wrenbury) you may want to look at the link below that shows a diary type day to day of the my latest transit build (curtsey of Wissel Dave (y))Big tip for your roof simply self tap a 8 x 4 ft 9mm board or two straight down the middle of the roof then cover with your ceiling boards (y) this levels out/curves with the roof and supports the gaps between the reinforcement bars :) No messing trying to pack things or anything like that
terry
 
Forgot to say I am only 15/20 mins from wakey if you want a coffee and a chat
terry
 
Forgot to say I am only 15/20 mins from wakey if you want a coffee and a chat
terry

That would be Great Terry. Hoping to finalise a deal on a Boxer van this weekend.
Then its 3 months waiting for delivery. This will give me time for planning and gathering equipment and materials.
The finished Transit you did looks great...nice work on the units.

It would be nice to meet you and have a natter, i will PM you in a week or two (y)
Thanks.....Ralph
 
Hi Wissel, Thanks for taking the time to upload the pictures. I did have a load of questions to ask you and then i saw the blog ......Three hours later after viewing it all my questions are answered. I hold my hat off to you doing a blog and a van conversion at the same time...Well done its a great blog and a very nice conversion.

Thanks and glad you found it useful.

When I started to plan my van I really had no idea how to go about it and had loads of help from forums (mainly SBMCC - def worth joining). Doing the blog was my way of giving back if you know what I mean (although I really need to find some time to add more to it, have loads of photos and videos ready to be edited).

I love how you did the rear panel with the blinds on and the full size window in the door.Can you still open the rear windows from inside the van ?

Yep.

I used Polyplastic windows in my build as opposed to Seitz for one big reason. With Seitz a hole is cut, batten around hole, and window is fitted one side with blind the other at the same time (you screw through the blinds into the window, this is what holds the window in place).

With Polyplastic a hole is cut, batten around hole, and window is fitted to the batten with clips. This allows the windows to be fitted much earlier than the blinds and the inside wall to be finished before the blinds are fitted (it also gives a choice of blinds).

On my rear windows the blinds are fitted to the rear panel and the windows to the doors. With the blinds open I can open the windows as normal.

Do you have any problems with the blinds sucking out when the rear door is open ?

No they are fine.

One of the reasons I did it this way is so during the winter I can open the rear doors to get to the boot without loosing all the heat from the van. One of the reasons I fitted the front bulkhead was for the same reason, I can exit through the front doors without much heat loss.

One quick question that's been bothering me..... When you board the ceiling do you follow the curvature of the van roof or do you pack it out to make it flat ?

On my roof I kept the curvature across the van to maximise head room.

I fitted battens length ways between the roof joists where the wall units would finish to give something to fix the wall units to. I build these battens up so the roof was flat length ways. I'm not explaining this well, here are a few pictures:

Broken Link Removed

Broken Link Removed

Then with the insulating completed added the ply roof:

Broken Link Removed

When the ply was stuck I covered it in vinyl:

Broken Link Removed

Then trimmed and fitted the bottom of the roof lights:

Broken Link Removed

As Mitzimad said the angled bit at the edges of the roof is ideal for cabling which is why it's not insulated in the pictures above. I ran all of my cabling through conduit within this area then insulated over the top.

As Minx said the small shelf around the back is really useful (I did the same). Also, it lets cushions sit up straight as the sides on a Ducato/Boxer/Relay slope inwards a little if following the curve of the van.

Not sure if this has already been mentioned, but having your van spray insulted might be a good idea. It's one thing I wish I had done.

I'd also take Terry up on his offer. I would recommend popping to see him with your new van and a load of new parts inside. Then pop in for a coffee.

During the time it takes to finish your coffee Terry will have probably finished your van - job done :LOL:

Good luck

Subscribers  do not see these advertisements

 
"During the time it takes to finish your coffee Terry will have probably finished your van - job done"
I wish :Dbut he really needs to call before he buys stuff for his build (y) could well save a small fortune ;)
terry
 
Hi Wissel, Thanks for more great pictures it really helps its like working from a drawing.
What size insulation do you get in the roof space so it doesn't come below the van roof supports ?
Is it the same thickness all around the rest of the van ?

The reason i ask is....i just want to make sure i can get all the required insulation and floor / ceiling materials and still have a decent head clearance. The van i would like to go for has an overall internal height of 1.923mm.
I dont think i would do anything different to what you have done to the floor and ceiling.
What kind of clearance do you have at the highest point ?

One more quick question to all the funsters reading this is ...one of the options i have on the new van is reversing camera built into the rear brake light and then viewed on the radio 5" screen or reversing sensors.
Never had either, just wondered what your thoughts were :)

Many Thanks.....Ralph
 
I wouldn't pay extra for a manufacturer installed reversing camera and radio screen/sensors. They can be fitted afterwards quite easily at a fraction of the cost.
 
Hi Ralph I would run extra wires down to the back (just in case)that way you will have best of a aftermarket fit one (around £60/80 )or the factory fit --personally I would prefer the after market fit simply because I know where wires go and less to go wrong /easy to replace--Factory fit could mean visits to dealers who will know very little about them -probably never seen one - ;) Only camera or monitor to go wrong on self fit (the wires won't go wrong) on factory fit who knows with electronics these days ????
terry
 
Rear Doors.

These always look like "bodge" and it's tarted up van rather than a proper motorhome.

So why don't people remove the back doors and fit a permanent skin ? Hardly rocket science, it removes lots of places that can leak, be cold and drafty, can fit a nice window if needed. Less weight.

Subscribers  do not see these advertisements


Join us or log in to post a reply.

To join in you must be a member of MotorhomeFun

Join MotorhomeFun

Join us, it quick and easy!

Log in

Already a member? Log in here.

Latest journal entries

Back
Top